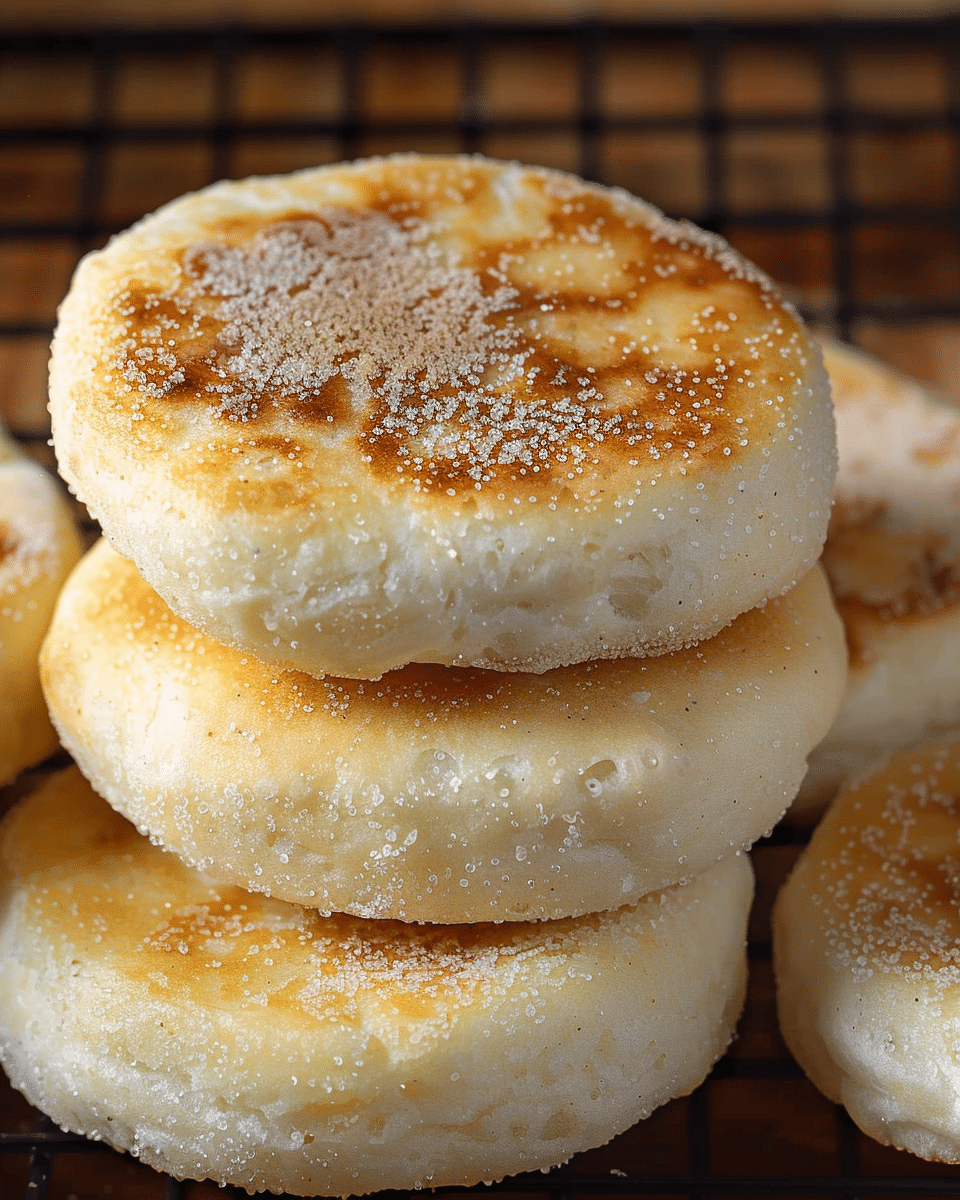
A toasted English muffin slathered in butter and jam is one of life’s little pleasures. You’ll be happy to know that perfect homemade English muffins are easy to make with good instructions and no special equipment. These muffins are golden brown on the outside, soft and airy on the inside, and perfect for breakfast or brunch.
Why You’ll Love This Recipe
Making English muffins at home is surprisingly easy and rewarding. With just a few simple ingredients and no special baking equipment, you can create warm, fluffy muffins that taste better than store-bought ones. The key is the technique—dry frying them in a skillet ensures that golden crust without the need for an oven. Whether you’re enjoying them with butter, jam, or as part of a savory breakfast sandwich, this recipe will become a go-to for your morning routine.
Ingredients
(Tip: You’ll find the full list of ingredients and measurements in the recipe card below.)
-
1 ¼ cups warm water (it will feel warm on your wrist)
-
1 tablespoon sugar
-
1 teaspoon instant dry yeast (e.g., Rapid-rise yeast)
-
2 tablespoons oil (canola, vegetable, or neutral olive oil; melted butter works too)
-
2 ¾ cups all-purpose flour or bread flour, plus up to 1/4 cup extra
-
1 teaspoon salt (add an extra pinch if using kosher salt)
-
Cornmeal for dusting (about 2-3 tbsp)
Directions
-
Make Yeast Mixture: In a medium-large bowl, add warm water. Sprinkle sugar over the surface, then sprinkle yeast over the top. Let it sit for 10 minutes. It should foam and cloud up, indicating the yeast is active.
-
Make Dough: Add oil, salt, and flour to the yeast mixture. Stir with a rubber spatula or wooden spoon until well combined. Transfer the dough to a floured surface and knead for 5 minutes, adding flour gradually until the dough is no longer sticky (you may need about 3-4 tbsp more flour).
-
Let Dough Rise: Spray the inside of a medium-large bowl with oil. Place the dough inside, cover loosely, and let it rise for about 1 hour or until doubled in size. To speed up the rise, place the bowl near a warm oven (turned on low) for a 30-50 minute rise.
-
Form Dough into Muffins: After the dough has risen, transfer it to a floured surface and knead a couple of times. Divide the dough into 10 equal pieces, shape into balls, and flatten into discs about 3/4 inch thick. Dust a sheet pan with 1 tablespoon of cornmeal, and place the discs on it. Sprinkle the tops with more cornmeal and cover loosely with a kitchen towel. Let them puff up for about 20 minutes.
-
Dry Fry Muffins: Heat a large frying pan, griddle, or cast iron skillet to medium-low heat (about 4 out of 10). Lightly oil the pan and transfer as many muffins as will fit, leaving a small gap between them. Cover the pan and cook for 9 minutes until the muffins are lightly golden brown. Flip the muffins over, cover again, and cook for another 5 minutes. Check for doneness using an instant thermometer (it should read 200°F/93°C when inserted into the side).
-
Cool and Serve: Once done, transfer the muffins to a wire rack to cool for 10-15 minutes before enjoying.
Servings and Timing
-
Servings: 10 English muffins
-
Prep time: 1 hour 40 minutes
-
Cook time: 14 minutes (if cooking in 2 batches, add another 14 minutes)
-
Total time: 2 hours 15 minutes
Variations
-
Vegan Option: Use vegetable oil instead of butter and ensure that the other ingredients are plant-based.
-
Herbed Muffins: Add fresh or dried herbs (like rosemary or thyme) into the dough for a savory twist.
-
Sweet Muffins: Add a little cinnamon and sugar to the dough for a lightly sweet muffin that’s perfect with a cup of tea.
Storage/Reheating
-
Storage: Store the English muffins in an airtight container at room temperature for up to 2 days. For longer storage, place them in the fridge for up to a week.
-
Reheating: To reheat, slice and toast in a toaster or on a skillet for a crispy, golden finish.
FAQs
Can I use active dry yeast instead of instant yeast?
Yes, you can use 1 1/4 teaspoons of active dry yeast instead of the instant yeast. Just make sure to activate it in warm water before adding it to the dough.
Can I use whole wheat flour?
Yes, you can substitute whole wheat flour for part or all of the all-purpose flour for a denser, heartier muffin. However, this might slightly affect the texture and rise.
Do I need special equipment to make these muffins?
No, you don’t need any special equipment. A frying pan, griddle, or cast iron skillet is all you need to cook the muffins on the stove.
Can I freeze the muffins?
Yes, you can freeze the muffins. Once they have cooled completely, wrap them tightly in plastic wrap or aluminum foil and store in a freezer-safe bag for up to 3 months.
How do I know when the muffins are cooked through?
The best way to check doneness is by using an instant-read thermometer. The internal temperature of a fully cooked muffin should be 200°F (93°C).
Can I make these muffins ahead of time?
Yes, you can make the dough ahead of time and let it rise in the fridge overnight. Just let it come to room temperature before shaping and cooking the muffins the next day.
Why are my muffins too dense?
If your muffins turn out dense, it may be because the dough was overworked or not given enough time to rise. Make sure to let the dough rise until it doubles in size and handle it gently when shaping.
Can I cook these muffins in the oven instead of frying them?
While this recipe calls for dry frying, you can bake them in the oven. Preheat your oven to 375°F (190°C) and bake the muffins for 12-15 minutes or until golden brown.
What can I do if my muffins aren’t browning enough?
If your muffins aren’t browning, increase the heat slightly. You can also finish cooking them in the oven at 350°F (177°C) for 5-10 minutes.
How do I store leftover muffins?
Store leftover muffins in an airtight container at room temperature for up to 2 days. For longer storage, freeze them.
Conclusion
Making homemade English muffins is simple, and the results are delicious! With the right ingredients and a little patience, you’ll have golden-brown, perfectly toasted muffins that rival any store-bought version. Enjoy them fresh from the skillet, toasted with your favorite spread, or use them as the base for your next breakfast sandwich.

